WireGuard Part 3: WireGuard Installation
This article was last updated on: February 7, 2024 pm
Synopsis of the series:
- WireGuard article series (1): What is a VPN?
- WireGuard Part 2: Introduction to WireGuard - Fast, Modern, Secure VPN Tunnels
The installation of WireGuard is not difficult, here is the example of the equipment I used, including:
- Linux - Ubuntu 20.04
- Windows 10
- NAS - QNAP QTS 5.0
- Android
Ubuntu 20.04
⚠️ note:
WireGuard has Linux kernel version requirements.5.4 The above kernels include it.
If the kernel is lower than this version (typical such as RHEL and CentOS), it will require a more complex process involving kernel compilation, please log in yourselfOfficial websiteFind out more.
1 | |
After successful installation, there are the following files:
- CLI
wgwg-quick
- Systemd
[email protected]wg-quick.target
1 | |
✔️ Practical tips:
You can add the following line to the service file of WireGuard to reload the configuration without interruption.ExecReload=/bin/bash -c 'exec /usr/bin/wg syncconf %i <(exec /usr/bin/wg-quick strip %i)'
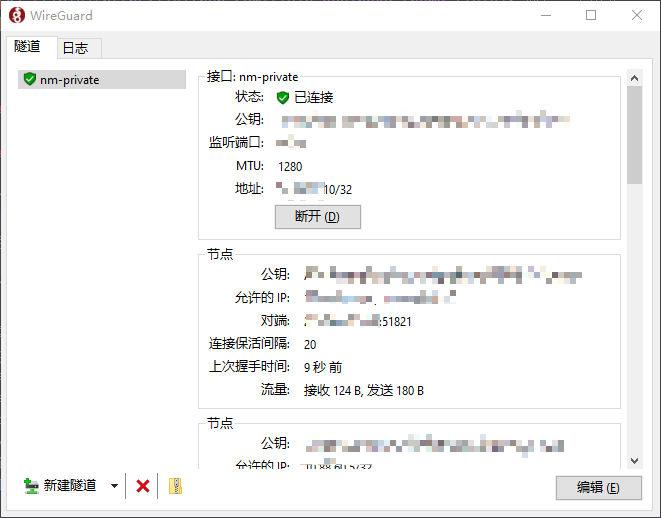
Windows 10
After installation, the WireGuard UI is as follows:
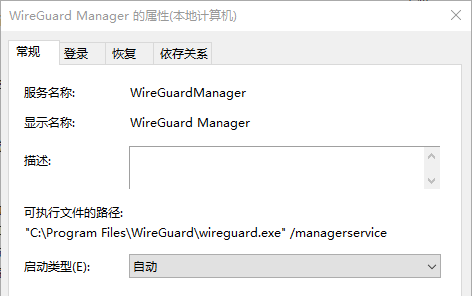
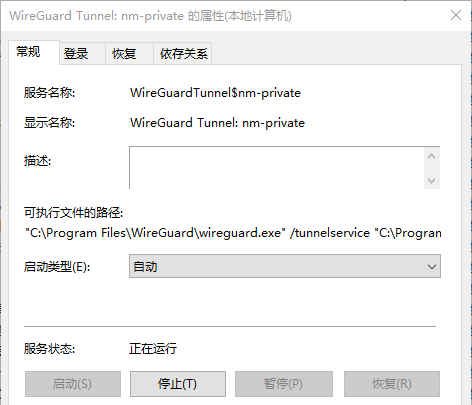
After starting WireGuard, there are 2 services:
Android
WireGuard Android client:

QNAP QTS 5.0
Why would I tinker with WireGuard, but here’s what happened:
-
The telecommunications network at home, there is no public network IPv4, before calling to ask for a public network address, gave a public network IPv4, but found that it was secretly withdrawn 😓 after a while Although there is an IPv6 public network address, many applications do not support it
-
QNAP provided by QNAPCloud has a very poor user experience without public IPv4
-
Home VPNs have been built with OpenVPN and IPsec, and the performance and user experience are really not good
-
The front-end time NAS was upgraded to QTS 5.0 (for security purposes, it will closely follow the vendor upgrade), and it was found that the Linux kernel has been upgraded
5.10, comes with WireGuard: 😏😏😏

-
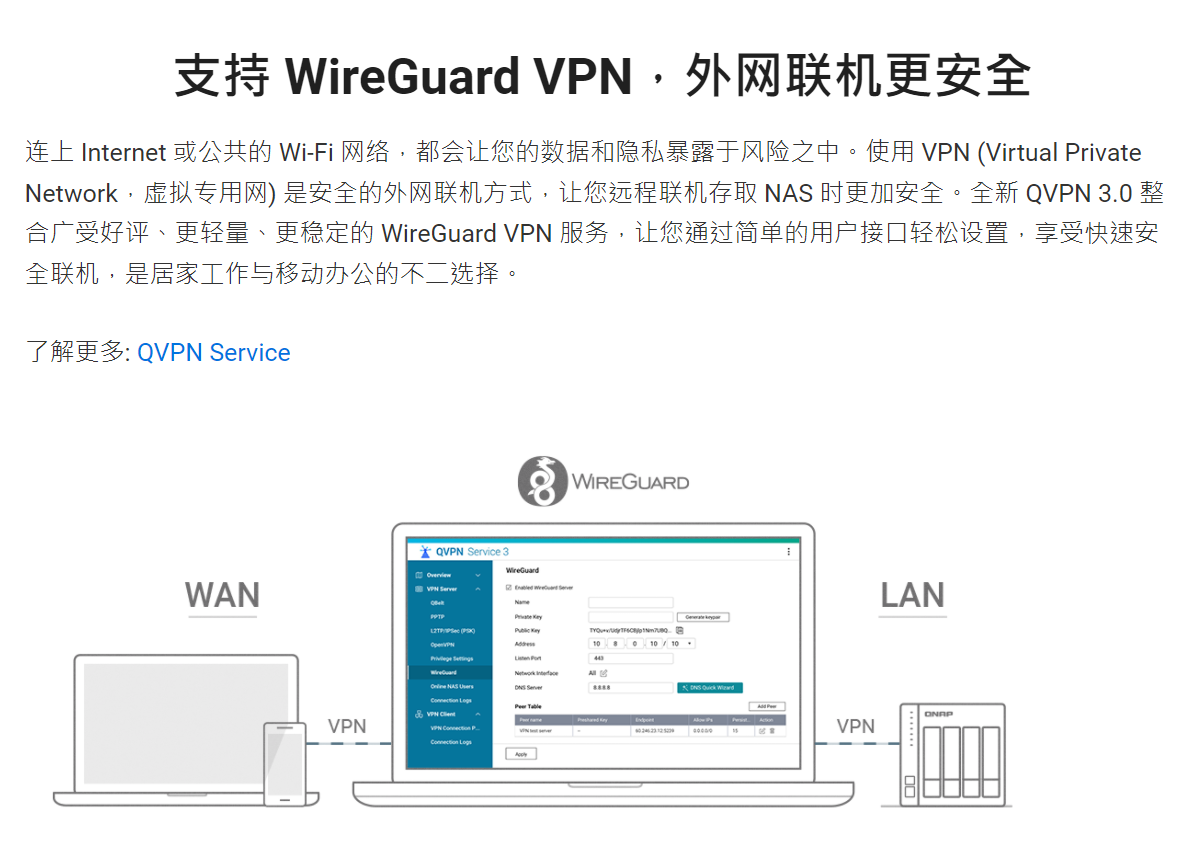
“The new QVPN 3.0 integrates the acclaimed, lighter, and more stable WireGuard VPN service, allowing you to easily set up and enjoy fast and secure connections through a simple user interface, making it ideal for working from home and working on the go.” Good guys, is it so awesome? That has to be tried.
-
That’s why I was tinkering with WireGuard for more than a month.
In summary, QTS 5.0 has built-in WireGuard and does not require installation.
Out-of-box content includes:
1 | |