WireGuard Part 7: Creating Full Mesh Networks with WireGuard and Netmaker
This article was last updated on: February 7, 2024 pm
Synopsis of the series:
- WireGuard Part 1: What is a VPN?
- WireGuard Part 2: Introduction to WireGuard - Fast, Modern, Secure VPN Tunnels
- WireGuard Part 3: WireGuard Installation
- WireGuard article series (4): WireGuard is quick to get started
- WireGuard Part 5: Introduction to Netmaker - A Platform for Creating and Managing WireGuard Networks
- WireGuard article series (6): Netmaker installation
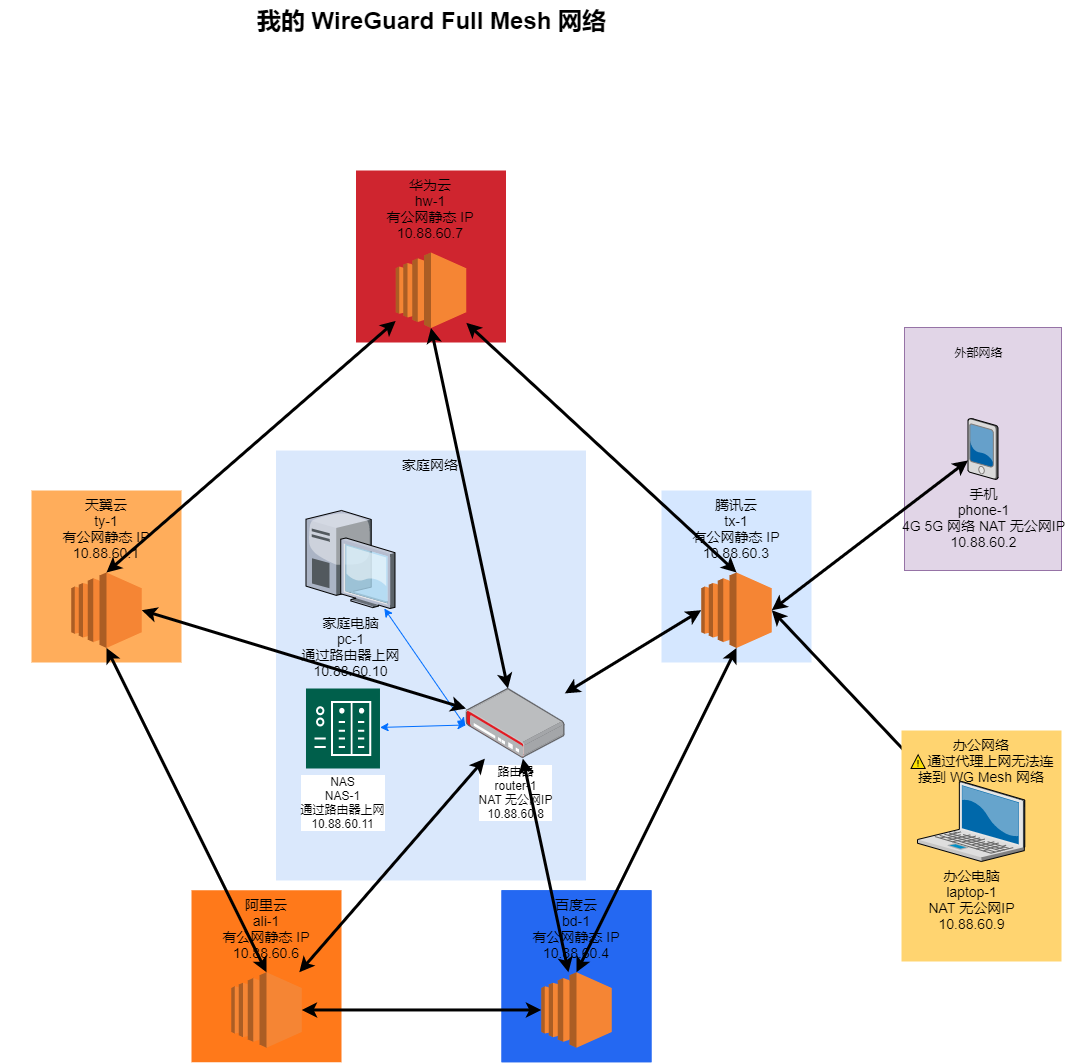
Finally, an important milestone has been reached, creating a Full Mesh network with WireGuard + Netmaker. Implement:
- Multi-cloud server intranet interconnection
- Home network routers are interconnected to the internal network
- Full Mesh Network Node Access other home devices (e.g. computers, NAS) through routers
- Office equipment intranet interconnection
- Mobile phone intranet interconnection
The specific architecture diagram is shown in the following figure:
Start configuring!
Create a Full Mesh network
Start by creating a network through the Netmaker Dashboard and configure it as follows:
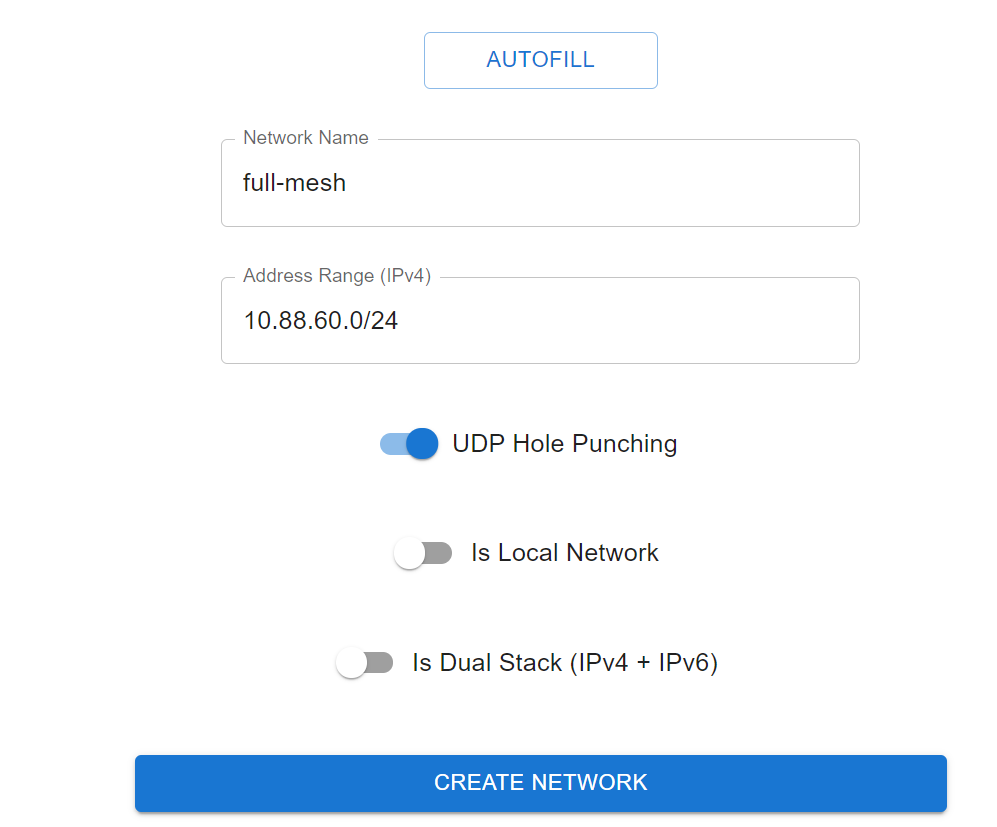
- Network name: fill in on demand (can be automatically generated)
- IPv4 address range: fill in on demand (can be automatically generated)
- Enable: UDP punching (for devices that require NAT to access the Full Mesh network)
- Down: Is Local Network (shut down if all devices are not connected to the local network)
- Off: Dual-stack (recommended to reduce complexity)
Once created, you can click again Network Details Edit the details, as shown below:
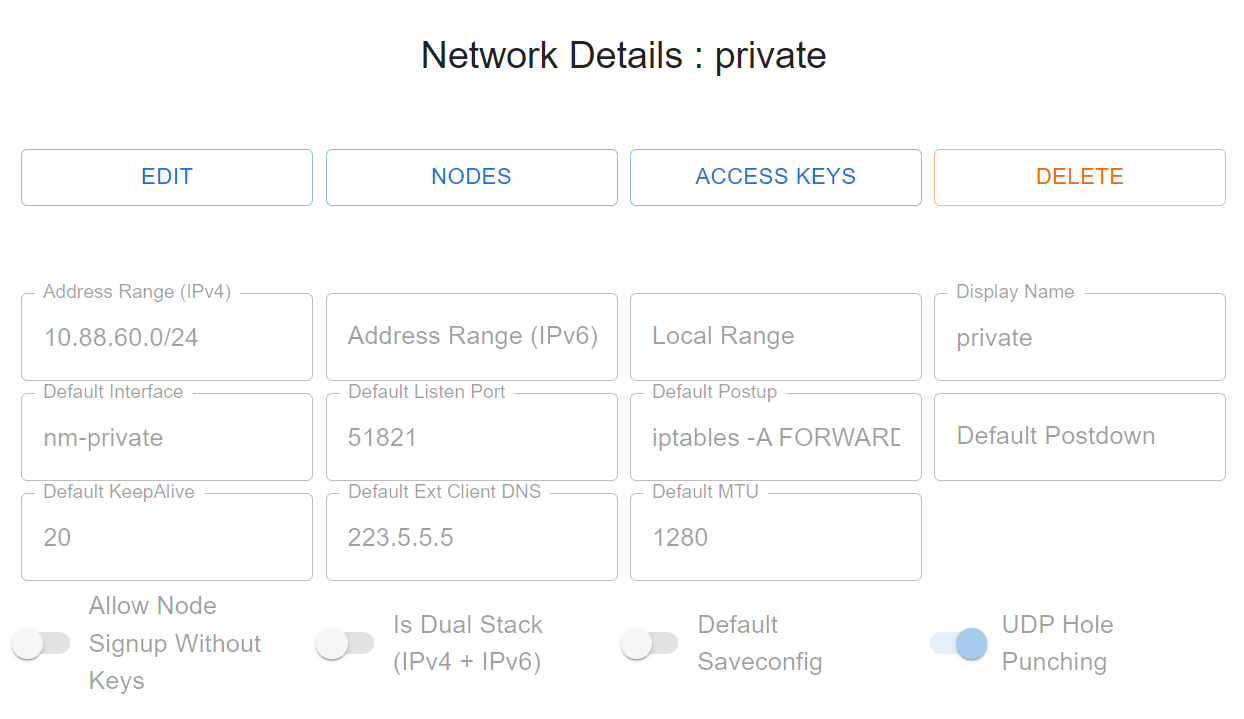
Include:
- IPv6 address range
- Network interface name
- Listening port
- Postup
- Postdown
- Keepalive
- Default external DNS
- MTU
- Whether to allow node registration without access keys (shutdown recommended for security reasons)
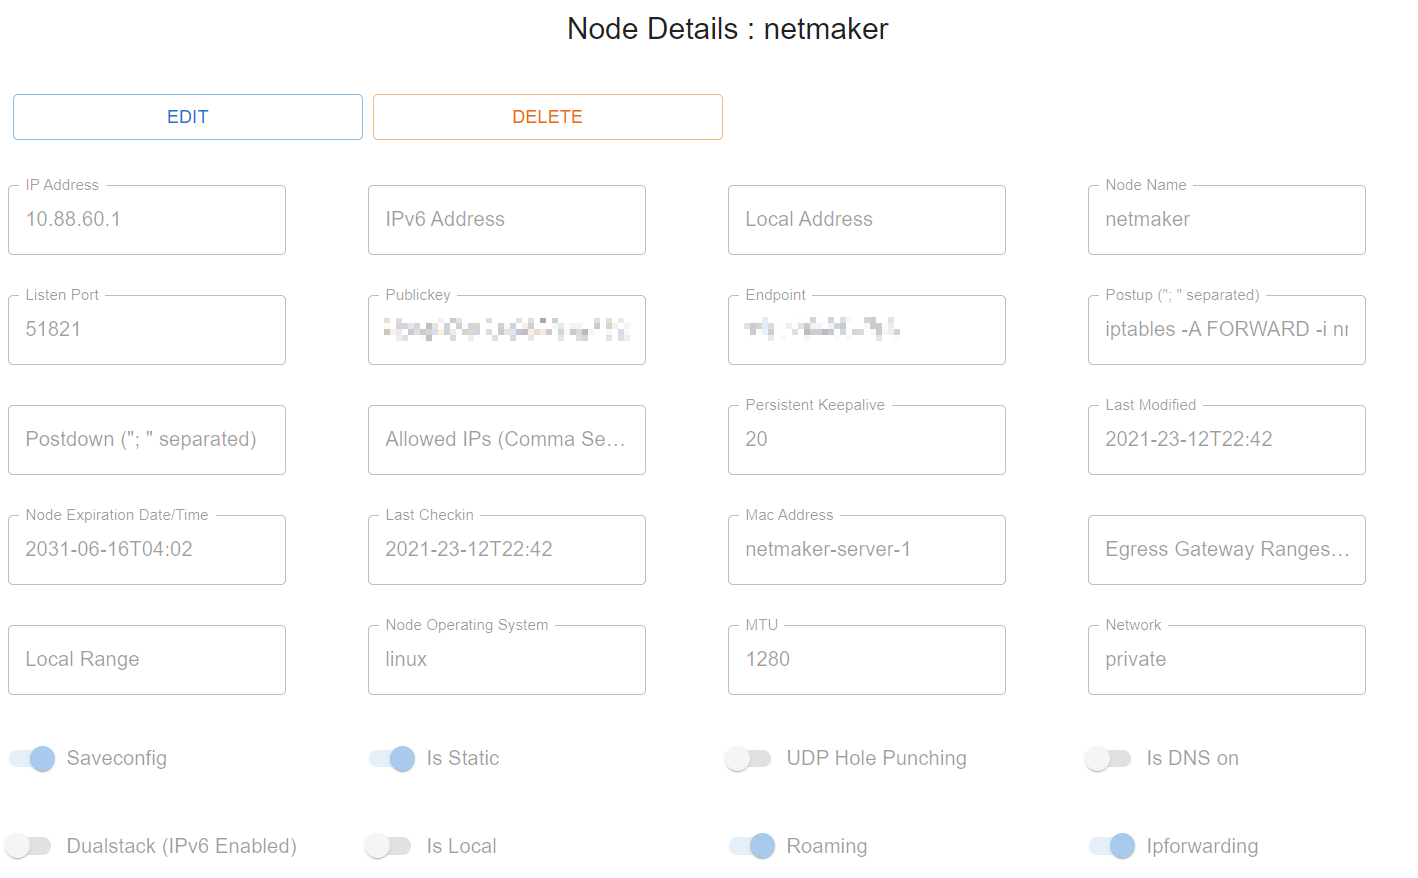
View the status of the node where Netmaker is located
After the network is created, the node where Netmaker resides automatically joins as a client Nodes page to view its status and information, as follows:

You can view its DNS records on the DNS page as follows: (The network name I actually configured is: private)

Create an access key
at Home / Access Keys page, create a specified number of clients (such as 10, then this key will automatically expire after 10 uses, and other clients can no longer use this key to join the network), as shown below:
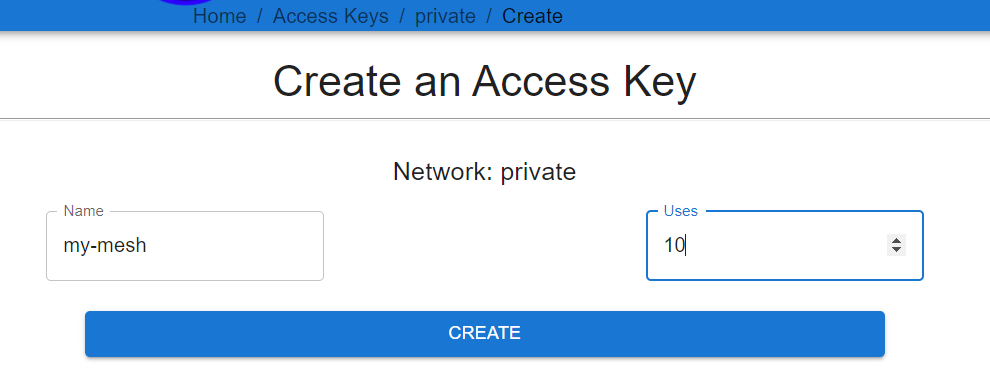
After creation, the specific command to join the network will pop up, as follows:

The specific command is as follows:
Linux:
1 | |
Docker:
1 | |
Windows (PowerShell Admin):
1 | |
Manual installation:
1 | |
Join the network through Netclient
According to the above architecture diagram, the nodes that need to be added are sorted out as follows:
- Linux: Huawei, Tianyi, Tencent, Alibaba, Baidu cloud servers, joined through Linux, Docker, or manual installation.
- Windows: Office computers (according to the architecture diagram, home computers and NAS are directly routed through the home router, without installing netclient and wireguard), and join through Windows or manual installation.
- OpenWrt: Home router, joined by manual installation.
- Android: Phone, unable to install netclient for the time being, passExternal clientsway to join.
Linux and Windows needless to say, just join in.
Linux
After Linux executes the command, it will prompt that the join is successful, at the same time
On the one hand, move netclient to /etc/netclient/ and pull the configuration file from Netmaker as follows:
1 | |
On the other hand, configure NetClient as a systemd service and start it, going to Netmaker every 15s to check in. The details are as follows:
1 | |
The log of check in success is as follows:
1 | |
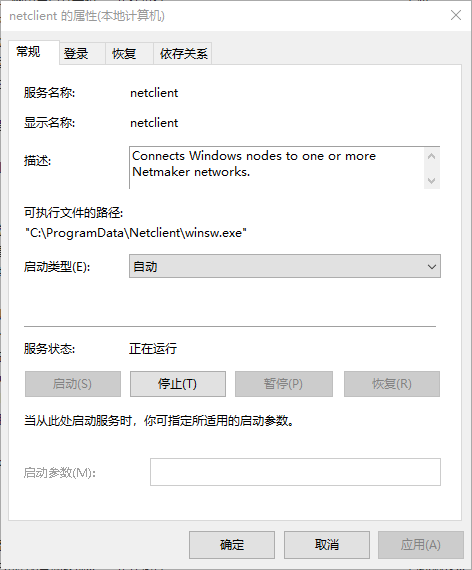
Windows
Windows operations are similar, with directories in:C:\ProgramData\Netclient, the system services are as follows:
⚠️ note:
My computer is performing PowerShell script downloads with or without an agent configured winsw.exe The process has not been able to download the complete whole, in this case, the remedy is as follows.
- Download WinSW-x64.exe:
https://github.com/winsw/winsw/releases/download/v2.11.0/WinSW-x64.exeand rename towinsw.exe - Copy the file to:
C:\ProgramData\Netclientdirectory - Run PowerShell with an administrator, run:
C:\ProgramData\Netclient\winsw.exe installInstalled as a Windows service - Then run:
C:\ProgramData\Netclient\winsw.exe startto start. - Verify that it is installed and started in Windows Services:

OpenWrt
For router OpenWrt, you can compile the netclient that can be run by yourself, and then run it manually to join successfully.
After successful joining, in order to run periodically, you can add the following to periodic checkins in crontab:
1 | |
These two planned tasks were realized in disguise Check in is performed every 15 seconds Purpose.
brief summary
At this point, in addition to home computers and NAS devices on the home network, as well as mobile phones, others have joined the Full Mesh network and can ping each other.wg show You can also see the information of peers. As follows:
1 | |
Join the network through an external client
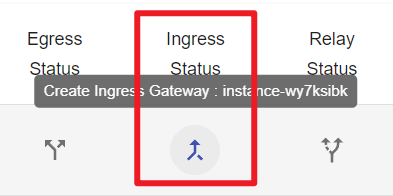
For mobile phones, it is currently necessary to join the network through an external client. The specific steps are as follows:
- Select a Node with a static IP address over the public network Ingress Gateway(can be understood as WireGuard’s relay server), used to receive traffic from mobile phones and forward, the configuration is also very simple, in Nodes page, click the following to configure a node:
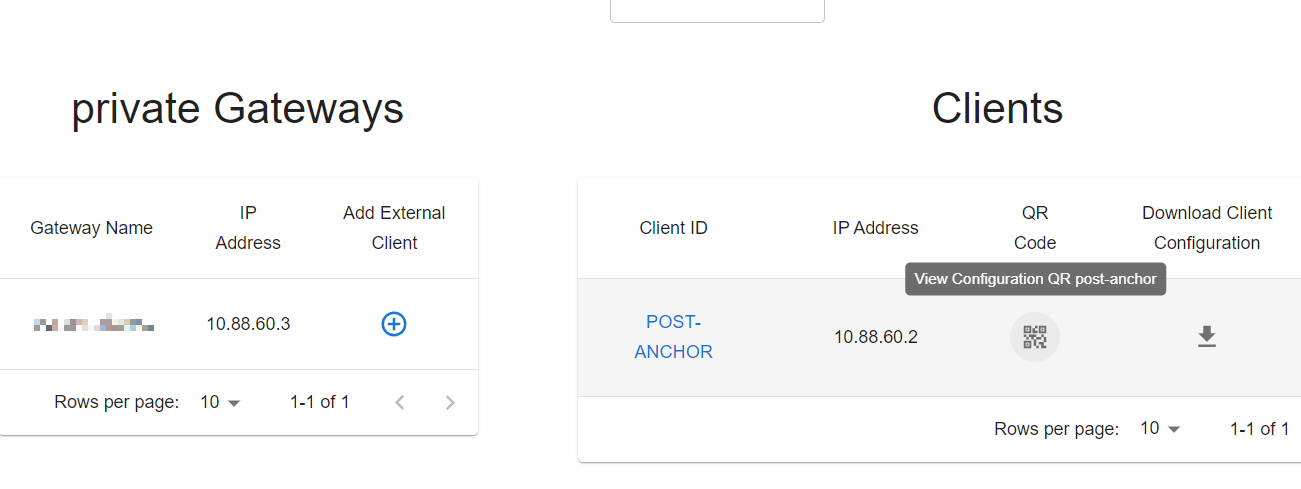
- Download and install the WireGuard native client on your phone (Android device);
- Create an External Client that generates a WireGuard configuration file that the WireGuard client can download or scan the QR code to connect. As shown in the following figure:
Node accesses the home intranet through a router
Here the computers and NAS of the home intranet do not directly join the Full Mesh network (you can also join directly, the steps are the same as above), but access the Full Mesh network through the router.
So far, we have only built a point-to-point mesh network, and each node can be directly connected to each other through WireGuard’s private network IP. But we can be a little bolder and give each node access to the LAN IP of the home network. Taking OpenWrt as an example, suppose OpenWrt runs at home and the LAN IP at home is 192.168.2.0/24How to make all other nodes access this LAN?
In fact, it is very simple, you can set a node as an Egress Gateway, allowing the interiorTraffic for the network is forwarded toexteriorThe specified IP range. HereinteriorThis refers to the WireGuard private network, which is in this article 10.88.60.0/24;exteriorNetwork refers to the home LAN network segment.
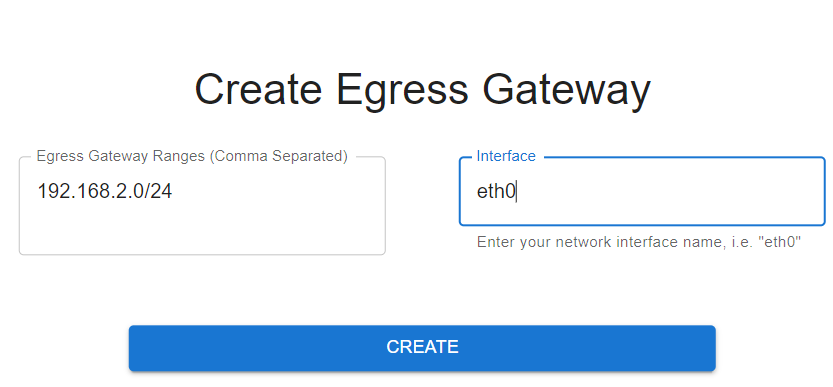
The operation steps are as follows:

Fill in the LAN CIDR block (for example:192.168.2.0/24 ) and an egress NIC (e.g., eth0). As shown in the following figure:
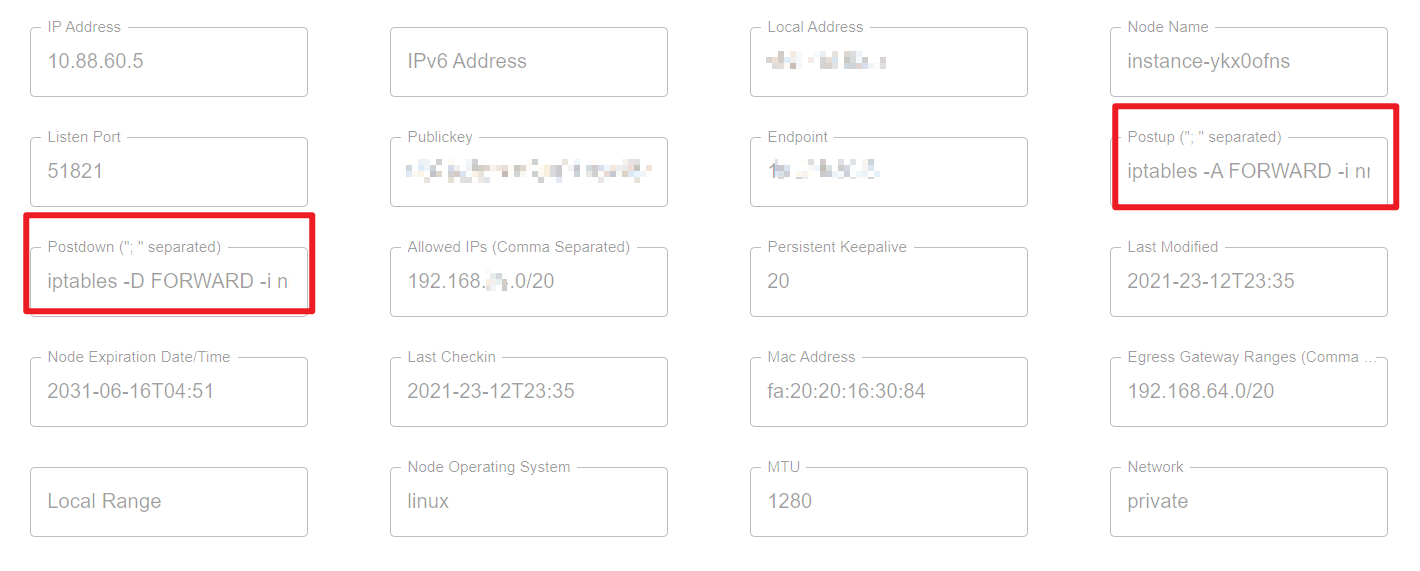
Once configured, the relevant iptables rules are added to the Postup and Postdown configurations of the OpenWrt node. As shown in the following figure:
wg show Check it out below:
peer: kXmPHKYv6L5cX<hidden>d5JFyq6NZB6dFE=
  endpoint: <hidden>:51821
  allowed ips: 10.88.60.8/32, 192.168.2.0/24
  latest handshake: 25 seconds ago
  transfer: 1.74 MiB received, 618.27 KiB sent
  persistent keepalive: every 20 seconds
The specific rules are:
1 | |
In addition to this, the relevant routing tables are added to all other nodes:
1 | |
Eventually, all nodes will have access to OpenWrt’s LAN IP.
summary
At this point, we have finally completed an important milestone in the WireGuard series: configuring the Full Mesh network with WireGuard + Netmaker and opening up the home LAN. 🎉🎉🎉